What is Weirdy Mail, you may ask? Well, its art, usually made in an unusual shape, that is mailed, as is, without box or envelope to cover it. I belong to a group of artists through AFA who exchange altered envelopes and postcards once a month. Once or twice a year, we have the choice to send something a little more interesting...hence, Weirdy Mail.
Here is something I created and mailed to my sweet friend, Melissa. I've included some progress pics and descriptions too. I love how it turned out! It even exceeded my expectations. I hope you enjoy it.
If you'd like more information or would just like to see me feature more things like this, drop me a comment. I'd love to hear from you!
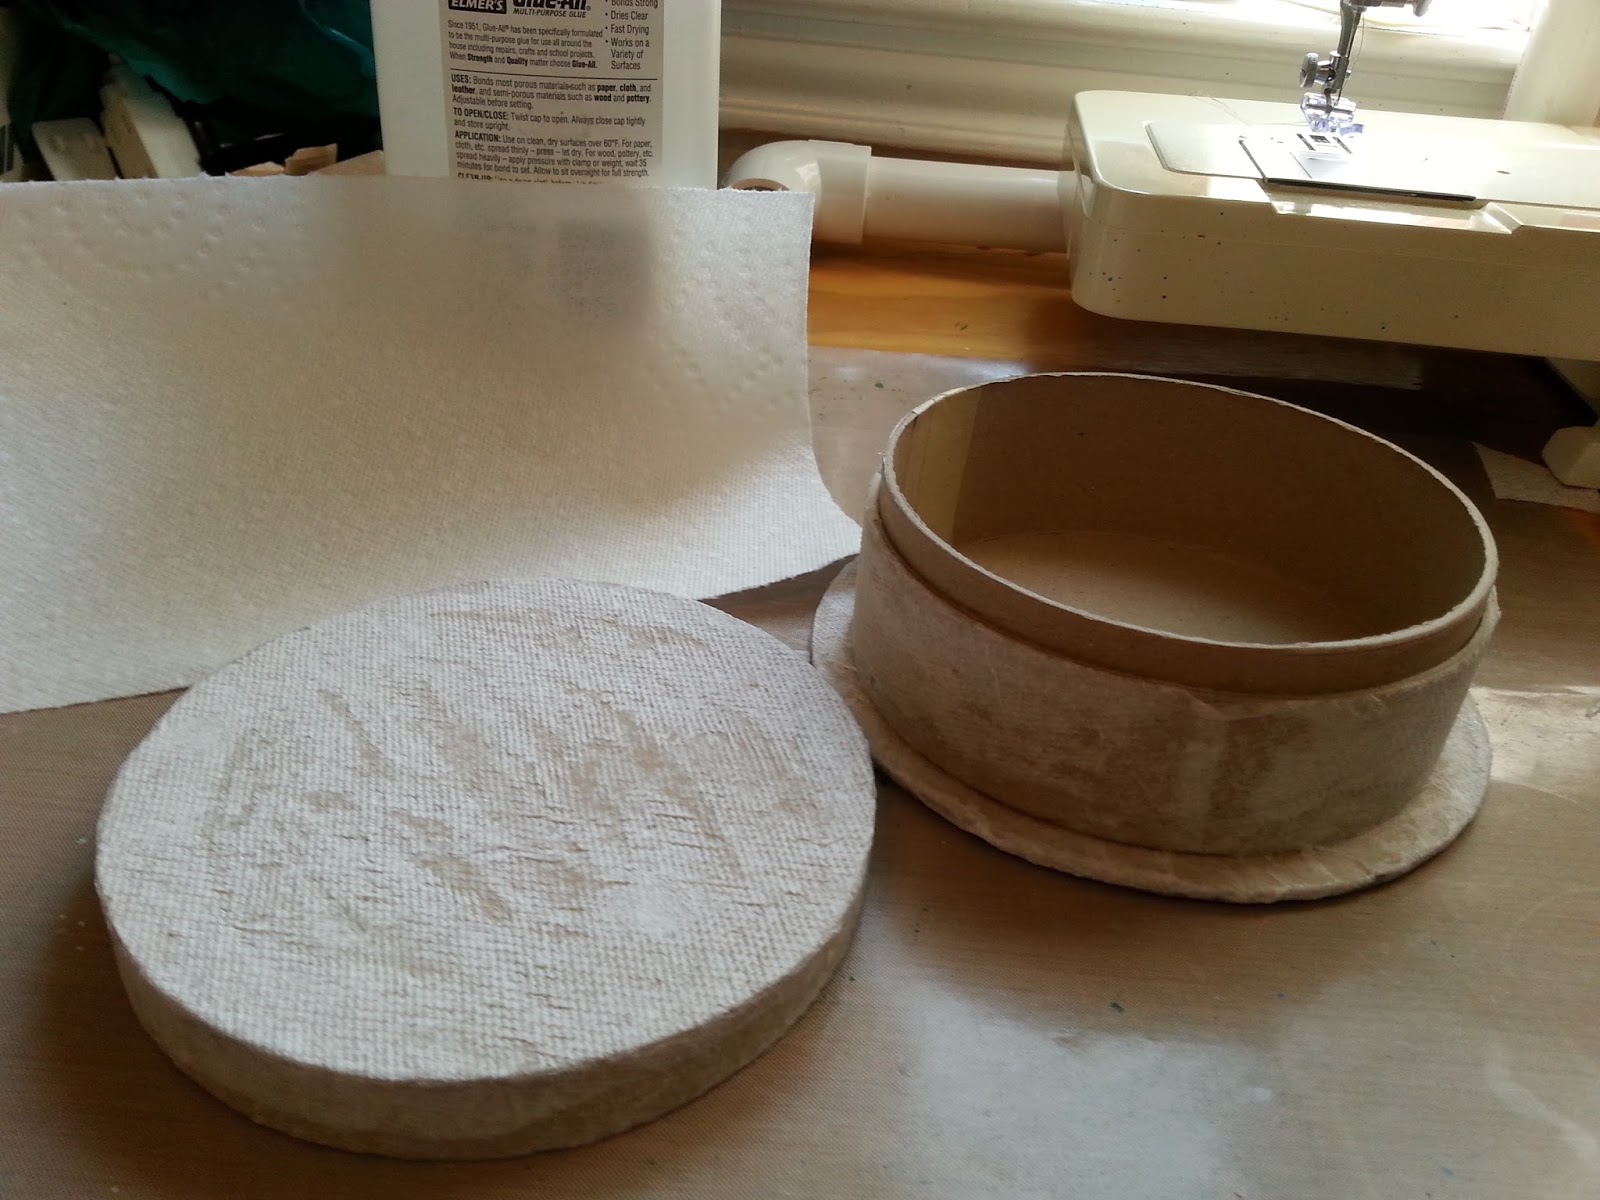
The whole thing started with these awesome cardboard pieces that were packing material in a set of cookware.
I created a base for the box out of cardboard and glued pieces together to form a box with a lip for the cover to fit on to.
In order to have some pieces fit inside of others I cut a section out and used masking tape to hold them together for gluing.
The outside of the box was then covered with paper towels decoupaged with white glue.
The entire box was then given a coat of gesso.
Petals and leaf shapes were cut out of thinner cardboard recycled from soda and cereal boxes and then covered with paper towels and white glue. The petals and leaves were also gessoed before painting. I used Daler Rowney Acrylic Inks in Olive Green and Sap Green on the leaves and box. Golden High Flow Acrylic in Alizarin Crimson Hue was used to paint the petals. The petals and leaves were then edged with black Sharpie marker. The center was made from a circle of cardboard, painted black, covered in large black seed beads and edged with a scrap of fringed yarn.
Another ring was covered and painted black for the mobile.
For the mobile, the flowers were constructed as one piece and painted just like the larger one. Leaves were created and added to the back of each flower. The centers are assorted black buttons. The rings were crocheted around plastic rings and a pearl drop was added to the center of each one.
The basket-weave effect was created by putting a layer of molding paste on the side of the box and using sheet rock tape to impress the grid pattern into the wet paste. After drying the sides were gessoed and painted with the rest of the box.
Curling the petals and leaves a bit before placing them on the box helps to create more 3D effect. The petals were glued to the center piece, the leaves to the box top and the completed flower glued to the middle of the box top over the leaves.
Although most Weirdy Mail is sent as-is, I did pack it in a clear plastic bag just to be sure that all the pieces arrived together.
I hope you enjoyed this little look behind the scenes!